I made a gorgeous quilt over the last few days, so I thought I'd share the picture progression with all of you!
I was searching for a sweet (yet simple!) baby quilt to make for my cousin's baby shower, when I found this pattern over at Cluck Cluck Sew. I loved it in the colors she used, but knew I could make it even cuter using more girly colors!
So my daughter and I headed to the fabric shop!
We found this super-soft flannel and knew right away that it was going to be our backing fabric.

Then we got to work finding 27 different fabrics that would coordinate! That was a challenge, but we managed.
Once my strips were cut, I was ready to get sewing!

I put together this beautiful quilt top in just about an hour, and I just laid it out and stared at it for a while. It is gorgeous! The colors just go together perfectly, and it's so bright and cheery!

Once that part was done, I went on to make my quilt sandwich. When I use flannel as the backing, it clings very nicely to the rug in my family room, so I use that area to pin baste!


Then I had to decide how I was going to quilt it. I didn't want straight lines like I usually do, but I haven't yet mastered the free-motion quilting. I spent a few hours doing research, and finally came up with this design:

I thought the clamshells would be perfect to put in each of the strips of fabric and the diamonds would look great in the white strips, but then I had to decide what color thread to quilt it in... So many choices!

I finally called in the big guns, and my oldest daughter decided on the colors!
I started by quilting the diamonds in the white strips using a turquoise thread.


Then I was excited! I couldn't wait to get going on those clamshells!
So I tried one, and it was an epic fail. It involved the seam ripper, and maybe a little bit of cursing under my breath.
Back to the drawing board, or the Pinterest board, as the case would be!
I spent another hour doing more research on quilting patterns that could be achieved easily with a walking foot. Most of them were grids, zigzags, or other forms of straight lines.
And then I found the 'orange peel', and a nifty little tutorial on how to do it with a walking foot.
I was sold!
I laid my quilt sandwich out on the cutting board, grabbed several round objects from around my house, and got to work figuring out which one would be the right size for my quilt.
I finally decided on one of the baby's bowls.
Hey, whatever works, right?
Then I got to work, using the tools of champions- a baby bowl and a Mark-B-Gone pen.

Several hours later, my quilt top was marked and ready to be quilted!!!

I took a break, fed the baby, got the big kids some lunch, and then sat at the sewing machine for the daunting task of sewing a bazillion little circles.
It seemed like it would take forever!
Surprisingly, I had the entire thing quilted in about two hours!! Not too shabby!
The center strip (the part that was 'flipped') was quilted in a pink thread.

The outsides were both quilted in a purple thread.


It looked amazing!
But there was still the business of those pesky blue lines from my marking pen.
So I grabbed my spray bottle, filled it with water (straight from the tap!), and sprayed down the quilt.
It was a little scary, I will admit.
But those blue lines disappeared right before my eyes!

I stuck the quilt sandwich in the dryer, and tumbled it on low heat for about 40 minutes until it was completely dry.
It did shrink up a little bit, but I think that made it look even better!


Then the realization came to me that I still had to deal with my least favorite part of making a quilt...
Making bias tape.
It's horrific.
I hate the waste.
I hate how much fabric it uses up.
I hate cutting on the bias and throwing away all of those triangles!
And then I found this tutorial.
And in about ten minutes, I had enough bias tape to bind the entire quilt.
All from a fat quarter.
Yup. It was awesome.
So I sewed it on.

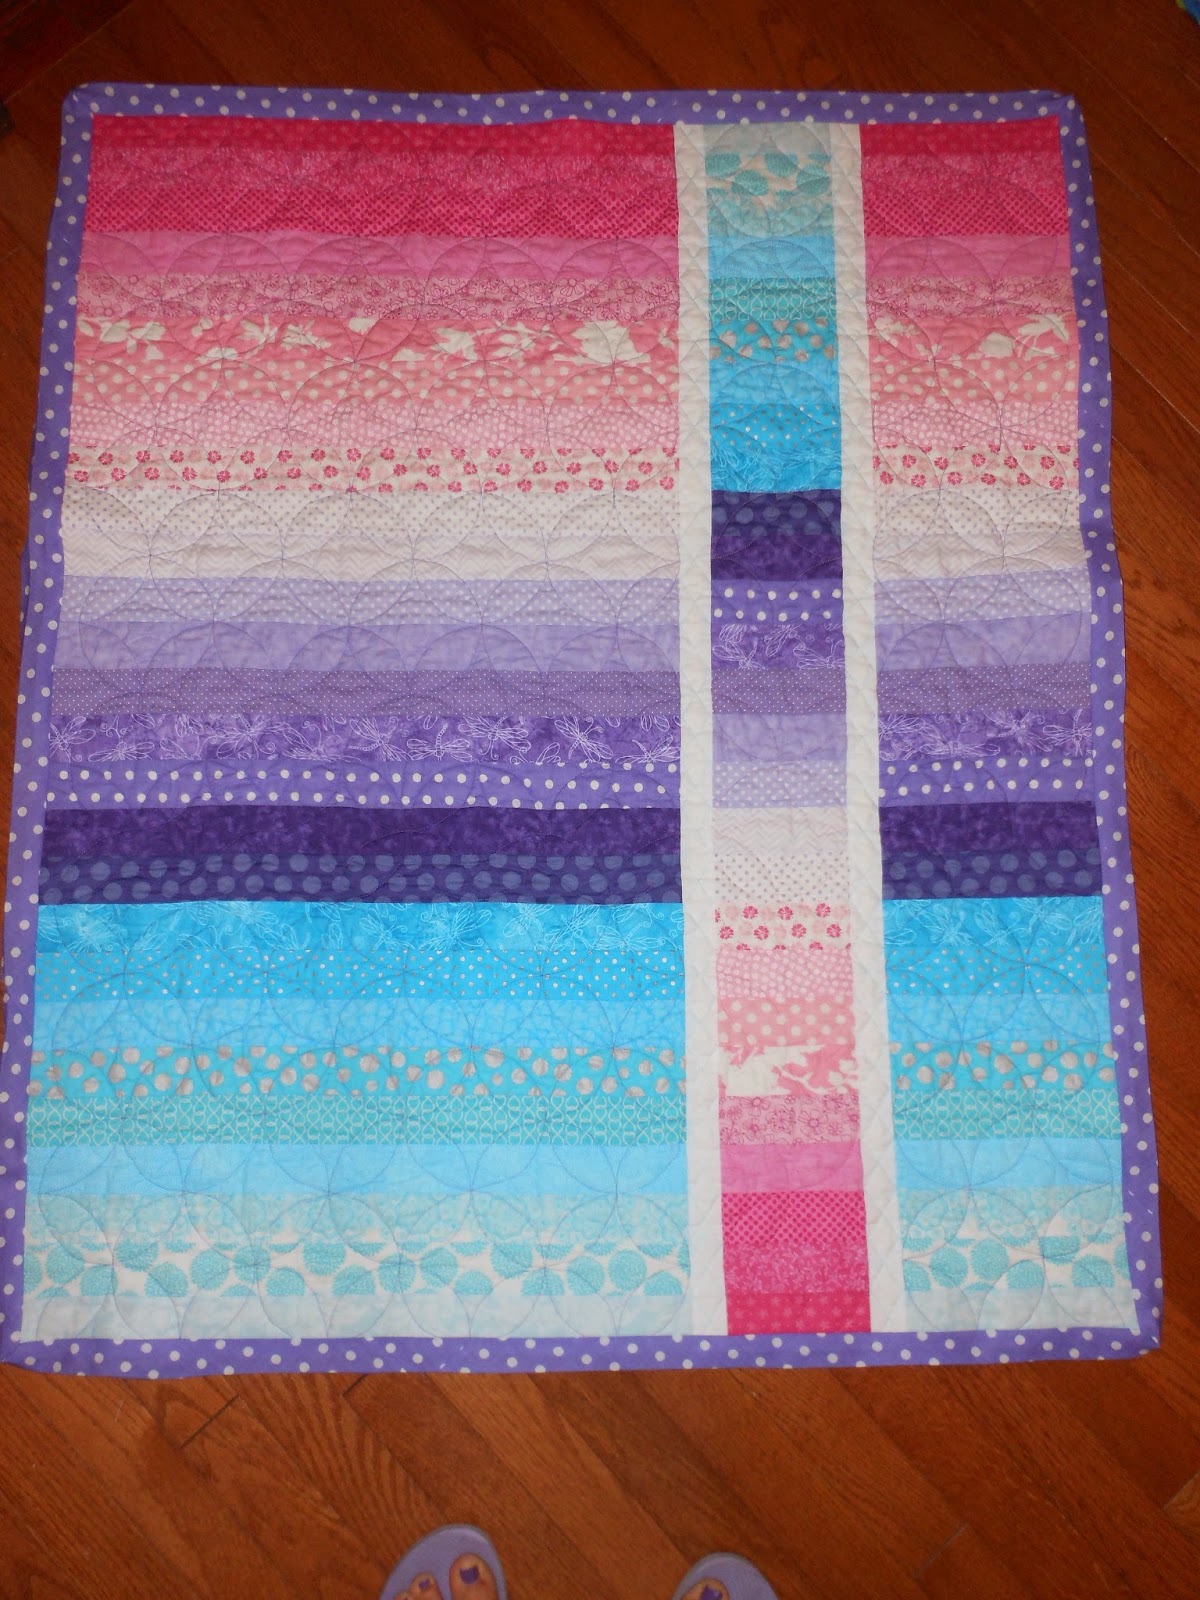
And now my quilt looks like this.
All that's left to do now is to sew the binding on the back of the quilt.
But that has to be done by hand.
Another day.
:)